Showing posts with label Quick Tip. Show all posts

2008-12-31

Quick Tip #3 - Head Swap Dremel Style

Or...How To Perform A Head Transplant When You Have Two Identical Pewter Dudes

All you need is a pair of clippers, a hobby knife, and a Dremel.


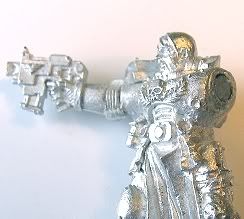
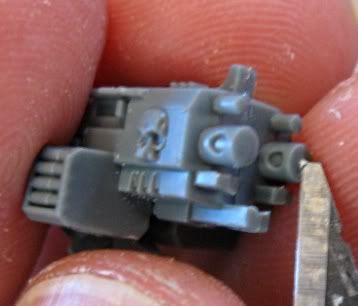
Step One - Off With His Head:
First let me tell you that it is a good idea to have two sets of clippers, one for pewter and one for plastic. (Using clippers on pewter gouges the blades, leaving unattractive tool marking on your plastic.) When cutting, place one blade of the clipper under the chin and the other behind his head. SNIP!


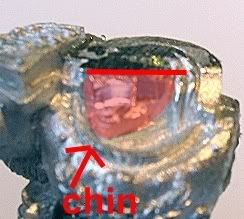
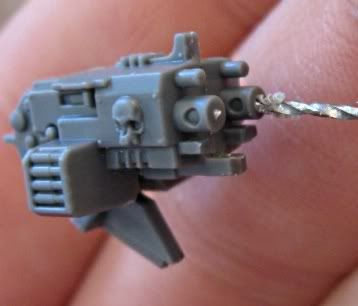
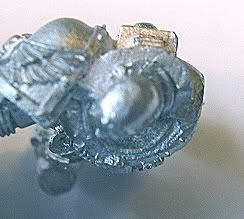
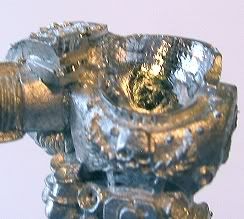
Step Two - Clean Up the Neck Cavity: Once you've beheaded the poor Sergent, its time to tidy up for Dremeling. Clip off the chin (or any other easily removable section) and file down the top, nice and flat.

WARNING: the drimmel bit will occasionally jump off the area that you are filing down so make sure to wear gloves!!!

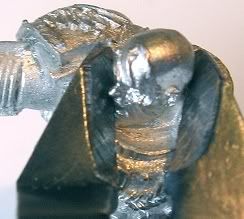
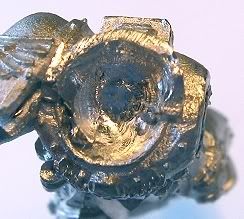
Step Three- It's Carving Time: Use the larger Dremel bit that comes with the basic kit (shown left.) Place the model on his side, as below, keep a firm grip on the Dremel (speed 8) and start widening and deepening that bad boy like you're prepping birds for turducken.


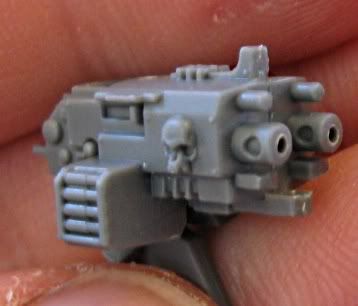
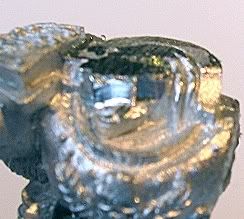
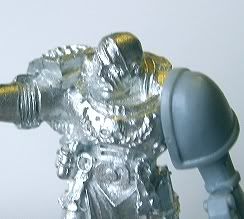
Step Four- Head Transplant: Once your done Dremeling, clean up any extra flash with a hobby knife and glue on the new head. Add some different weapons and change the direction of the head to further differentiate between the two models.


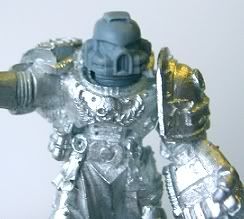
Happy beheading! (for the Emperor of course.)
Jeff C.
Reblog this post [with Zemanta]

2008-12-13

Quick Tip #2 - Toxic Sludge Water Effects

Ever thought about adding some water effect for that "Oooo you used water effects" reaction from your gaming group? Well I thought it was about time for me to try it out. I used Realistic Water from Woodland Scenics. This stuff is a pain, but here is a simple, effective way to make it your slave:

1) Before painting, carve a hole in your base & glue some plastic card to the bottom. Make sure that there are no leaks. I just use a bit of extra super glue to do this. When finished, you will have you a very shallow impression.


2) Paint the base, add flocking, & clear coat it. Also, make sure to paint the plastic card section what ever color you plan the water color to be.


3) Add pigment (paint) to the mix as desired then pour. I went with Catachan Green for the dirty toxic war zone feel.


4) Let Dry for 24 hours & repeat until you like the look. It took about 4 times until it filled up enough for my liking. The last time I didn't bother to add any pigment. The two pics on the bottom right are of the same base. The last one has a mat varnish on it. It dulled it too much for my liking, so I'll probably go back and a a bit more water effect later to bring back the shine.


I swore a lot because I'm impatient. Every morning was a disappointment, as my puddle had sunk AGAIN. But in the end, it looks pretty good.

Jeff C.

Realistic Water - Woodland Scenic
Reblog this post [with Zemanta]

2008-11-28

Quick Tip #1 - Drilling Out Gun Barrels

Drilling out gun barrels is necessary. It's a necessity. It's a necessary-necessity of coolness.

"But, can't I just paint black dots?"

No, you may not! Nobody ever shot a bullet out of a black dot...and neither will you.

The big hassle with drilling gun barrels is getting them centered. If the holes aren't centered, the Oooo-you-drilled-out-all-your-gun-barrels effect is totally lost. Wall-eyed guns are not cool.

Step 1: Using a hobby knife, put small notch in the center of the barrel.


Step 2: Use the notch as a guide for your drill bit.


Voila, it's done:


Now, it might take a few practice runs to get it right. So, in case you get all frustrated and feel like retreating back to the lame-o black dots:

Order of Coolness

1. Centered, drilled barrels
2. Imperfectly centered drilled barrels
3. Engraving "Tau-rrific" on the barrel
4. Putting an ork in a pink tutu
5. Black dots

Admin Control Panel

New Post | Settings | Change Layout | Edit HTML | Moderate Comments | Sign Out