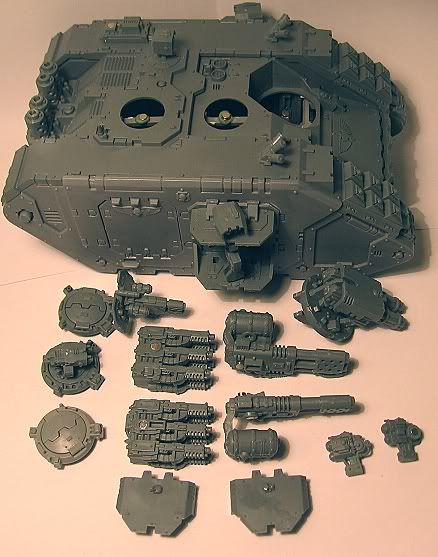
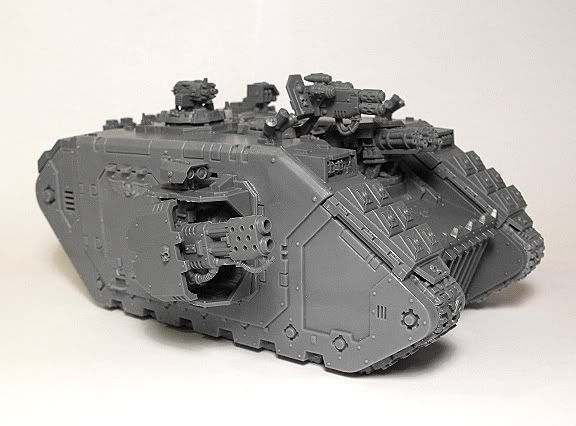
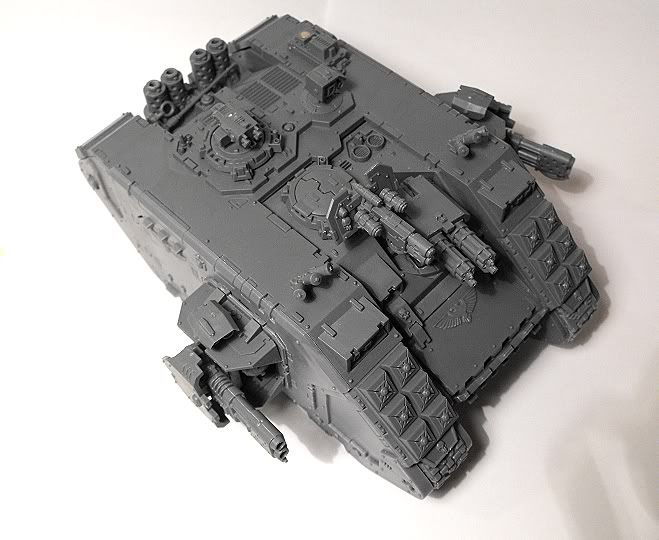
This thing was a beast, but well worth it. Now I have a Redeemer, Crusader, & once I get some more bitz, a standard Land Raider. The only out-of-the-ordinary things I used were the magnets and a 1/8" drill bit for the pinvice. The primary magnet used was the D040A ~ 1/8" Dia x 1/25" Thick from www.amazingmagnets.com. I also used D032A ~ 1/8" Dia x 1/32" Thick magnets for very thin peices or as a gap filler if two magnets didn't touch. All of my magnets come from www.amazingmagnets.com, because you get a free sample pack of magnets everytime you order.

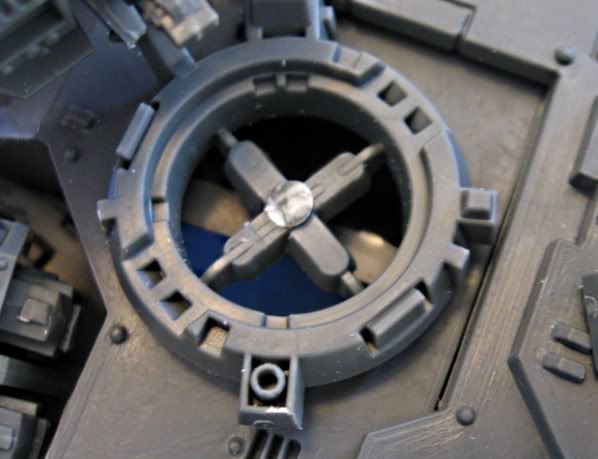
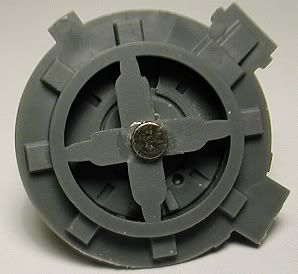
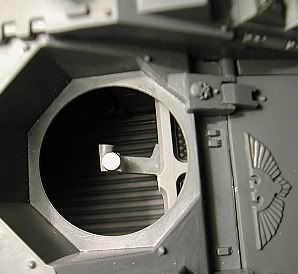
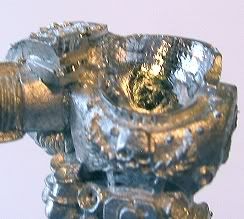
Magnetizing the Sponsons Supports: The basics: (1) Cut nobs off the sponson support (2) Drill 1/8" hole through center of the sponson support (3) insert two or more 1/25" Thick magnets
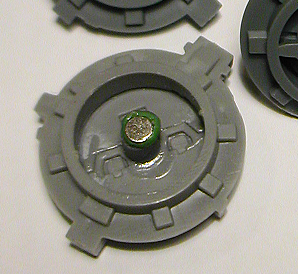
More Details: This is where the sponson work begins. The nobs mentioned above are the cylidrical pieces that the guns would attach to. When placing the magnets into the support, using thicker magnets might work a bit better. Just make sure that there are exposed magnets on both sides of the support. If you're short on magnets & only want to use 2, you can fill the center (between the magnets) with green stuff. Make sure that their polarities attract.
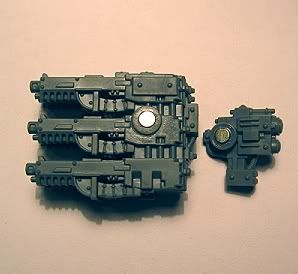
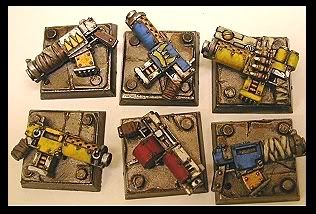
 Magnetizing the Redeamer Sponsons:
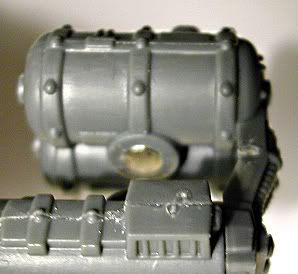
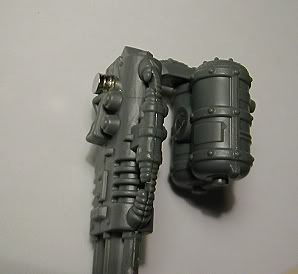
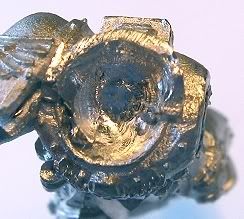
 The basics: (1) widen the flamer & fuel tank holes with a 1/8" drill bit. (2) attach 1/25" Thick magnets (3) glue the tanks & gun together.
More Details: This is not a scary as it looks. I suggest that you assemble the flamer parts & the fuel tank parts before you drill. After drilling and attaching the magnets, it's time to attach the flamer and the fuel tank with the back peice. MAKE SURE THAT THE POLARITIES OF THE GUN MATCHES THE SUPPORT!!!!

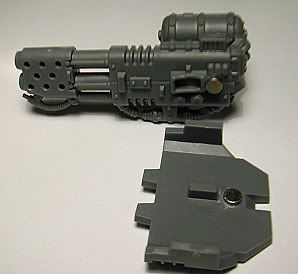
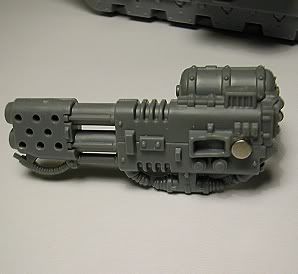
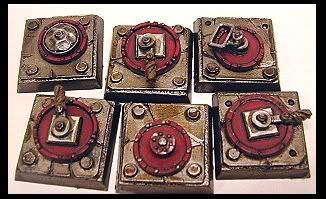
 Magnetizing the Redeemer Sponsons:
 The basics: (1) widen the gun & sensor holes with a 1/8" drill bit. (2) attach 1/25" Thick magnets
More Details: Not much to say here. Drill & attach magnets. Make sure the magnets are attracted to the support.
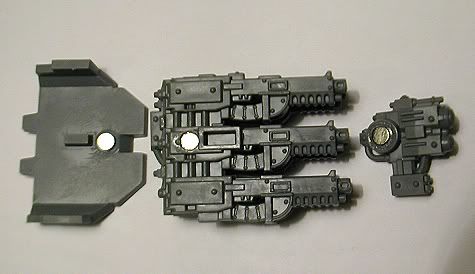
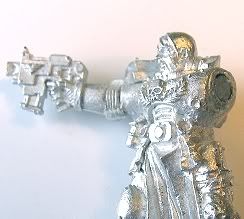
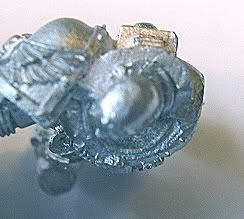
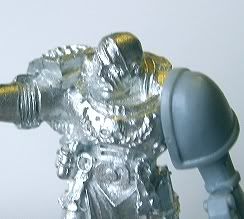
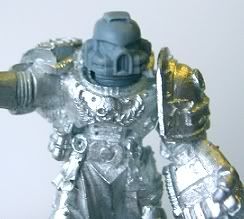
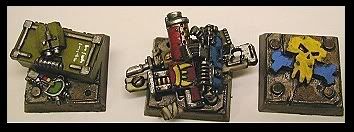
 Magnetizing the Gun Armor Plate:
 The basics: (1) attach 1/25" thick magnet behind the notch on the flamer(2) drill a 1/8" hole behind the notch in the hurricane bolter so that the magnet sinks in a bit and attach the magnet (3) attach 1/32" thick magnets onto armor plate (4) stack 1/32" thick magnets if there is a gap between the gun & the armor
More Details: This one took a bit more work than I had expected. The redeemer bit was easy. Just glue the magnet behind the notch. I had to use 2 so that it would reach the armor plate's magnet. The hurricane bolter was a bit more complicated. You have to drill a hole so that the magnet sinks in a bit. The reason for this is that the armor plate & the hurricane bolter have no space between them. Make sure to use the 1/32" thick magnets for the armor plates. This will help keep the armor plate from sticking out when it is with the hurricane bolter.
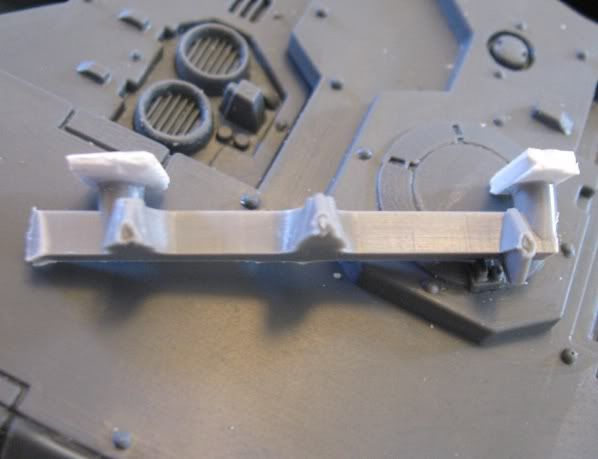
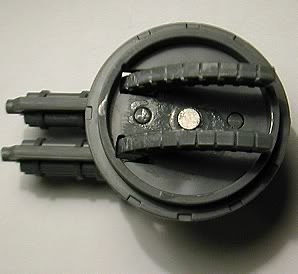
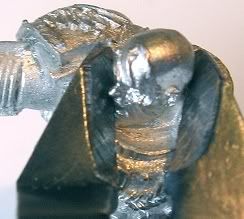
 Magnetizing the top hatches:
 The basics: (1)make an anchor for the hatch with sprue, (2) use the sprue in the hatch to hold the magnet, (3) attach the magnets.
More Details: Let me start by saying that this is not necessary. These hatches will stay in by themselves for the most part, but I'm anal & don't want them falling out.
The first step here is to make something for the magnet to anchor to. I used sprue sections with the knobby bits at the end. This is important to do because the hatch sticks out about an 1/8th inch when in place.
**If you do a bit of planning (unlike myself), you can avoid having to use tweezers to glue in the sprue.
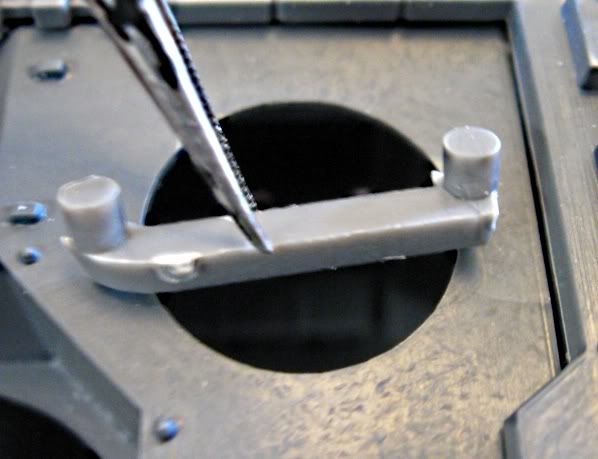
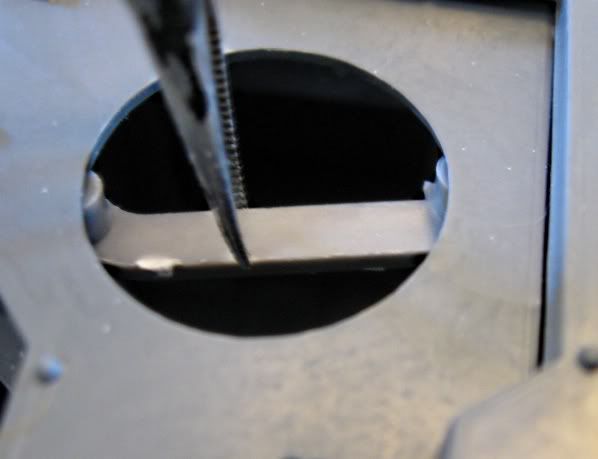
The Second step is the hatch itself. I just keep the sprue that comes in the hatch and clipped off the center circle. This will be where you attach the magnet.
Step three, magnets! I like the 1/32" Thick magnets here. They are less expensive and you don't need a strong hold. I use green stuff & superglue for the bottom magnet. It helps to close the gap between the top & bottom magnet. The hatch magnet is just superglued in. If you accidently cut out the sprue from the hatch, you can use a bit of sprue with greenstuff to make up the distance from the top of the hatch to the bottom magnet.


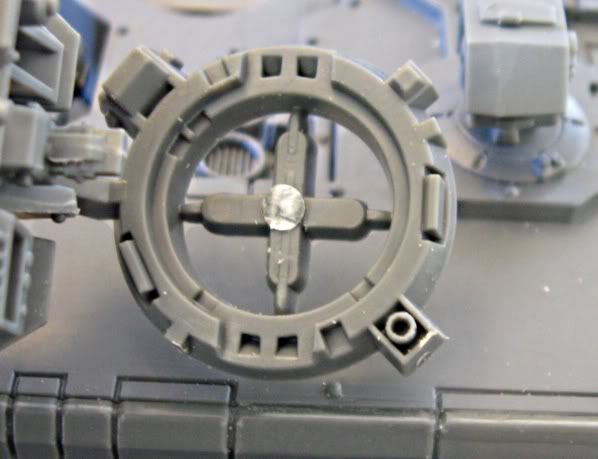
The Assault Cannon: This guy was a bit tuffer. The bullet-feeds force you to put the magnet directly in the center. Attaching the bottom anchor took two peices of sprue. I had to lower the anchor by adding some plastic card to the knobby bits. This kept the bullet feed from bumping into the anchor. The bit of sprue with the magnet on it is a corner peice that was long enouph to reach the magnet in the Assult Cannon.


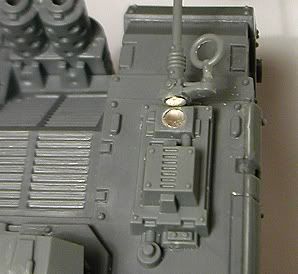
Magnetizing the Antenna: The basics: (1) Cut the anetnna from the base (2) Drill 1/8" hole in each, (3) attach 1/32" Thick magnets
More Details: This is not essential, but you'll be glad you did it when you see everyone else has broken and bent antennas. Start by cutting the antenna from the base and drilling a 1/8" hole in each. Use the 1/32" Thick magnets & be careful to drill in center. I would use the Barrel Drilling Quick Tip technique. Now attach the magnets with a bit of superglue & your done. You now have a break away antenna & have entered the relm of magnet overkill. Welcome to the fold.
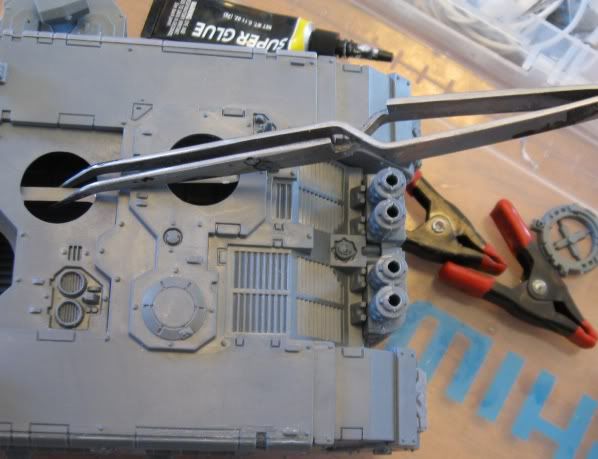
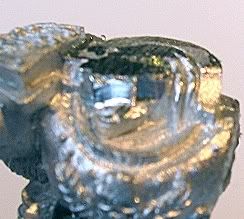
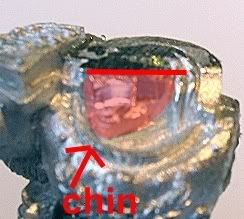
 Magnetizing the Front Exit:
 The basics: (1) use sprue for magnet anchor op of the upper door (2) attach magnet to the lower door (3) stack magnets there is to much of a gap
More Details: Let me first say that I am not going to paint the inside because that is where I'm going to keep the extra sponsons and accesopries that I'm not using. Not much to say here other than it's a bit of a pain and stacking the small magnets to fill the gap is really helpful.

Here is a look at the magnets from their site:
 | D040A ~ 1/8" Dia x 1/25" Thick NdFeB Disc Magnet, Ni-Cu-Ni plated.
(1 Item = 85 magnets)
Product Part #: D040A (Qty: 1 x US$6.80) |
 | D032A ~ 1/8" Dia x 1/32" Thick NdFeB Disc Magnet, Ni-Cu-Ni plated.
(1 Item = 100 magnets)
Product Part #: D032A (Qty: 1 x US$7.00) |


![Reblog this post [with Zemanta]](http://img.zemanta.com/reblog_b.png?x-id=85566b8b-7331-42f1-b9ba-f457da330404)
![Reblog this post [with Zemanta]](http://img.zemanta.com/reblog_b.png?x-id=fe4391b9-58e8-49a3-9605-428b3d9265c0)