2009-05-02

Tutorial - Grechin to Grot

In celebration of the new IG codex it's time to start a rebel grot army!

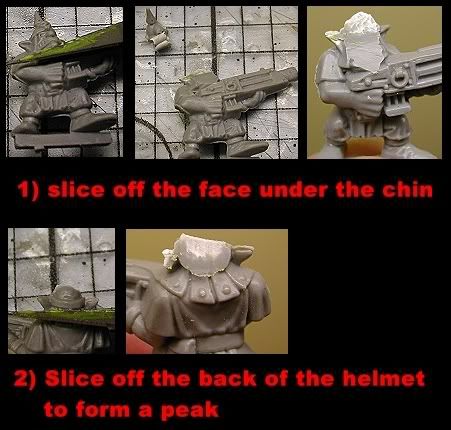
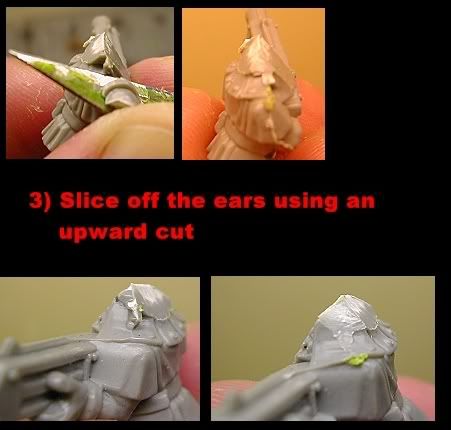
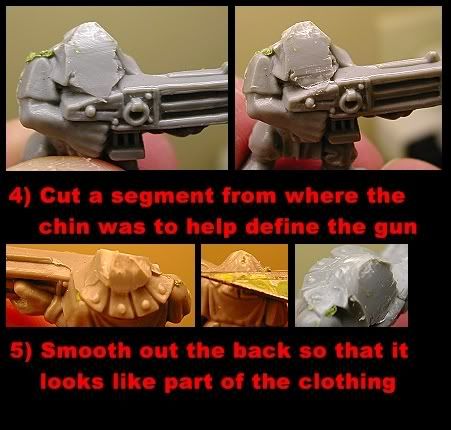
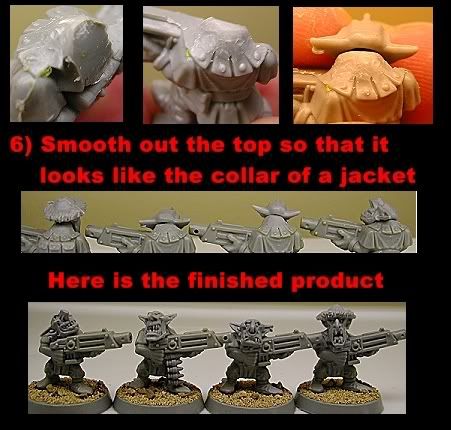
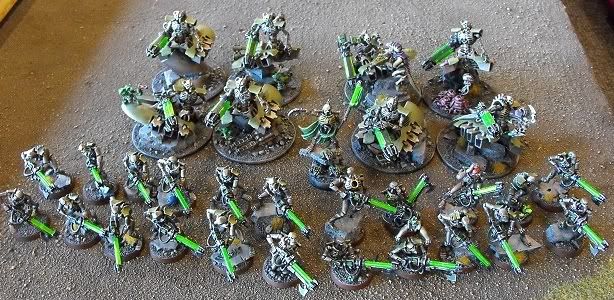
What can you do with that mountain of old useless 40k grechin? Give them a make-over. Here is what you need: old 40k grechin, WHFB goblin head, x-acto knife, & glue.

Photobucket - Video and Image Hosting


2009-03-31

The Storm Lord - It's Rainin' Super Heavies

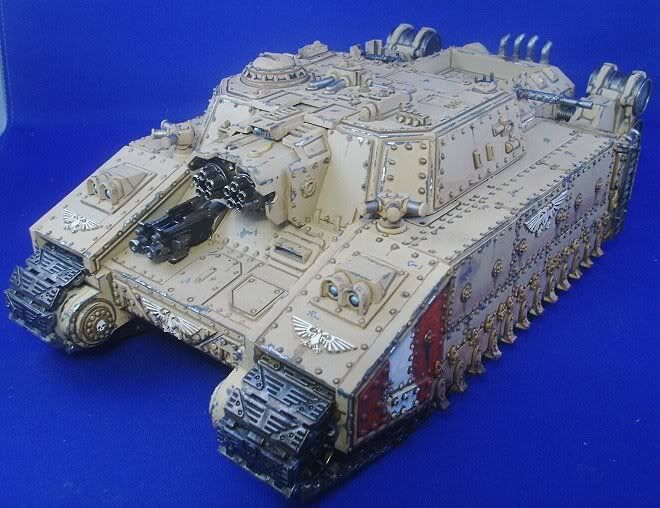
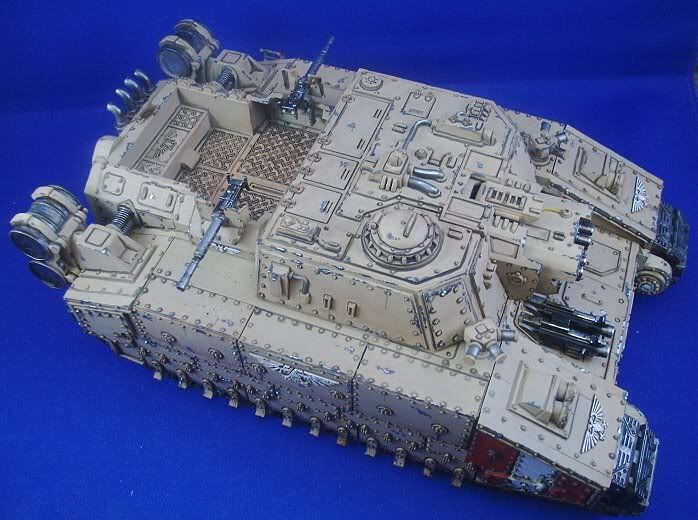
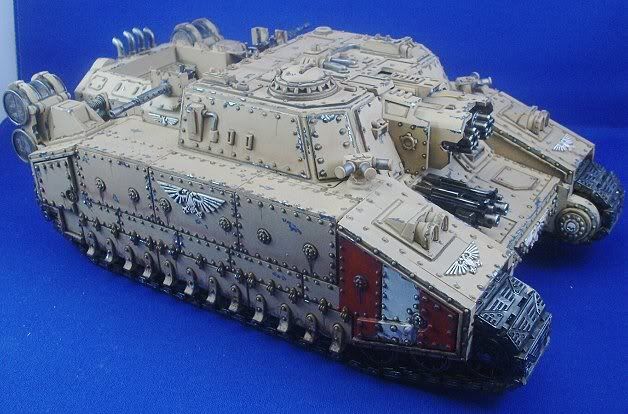
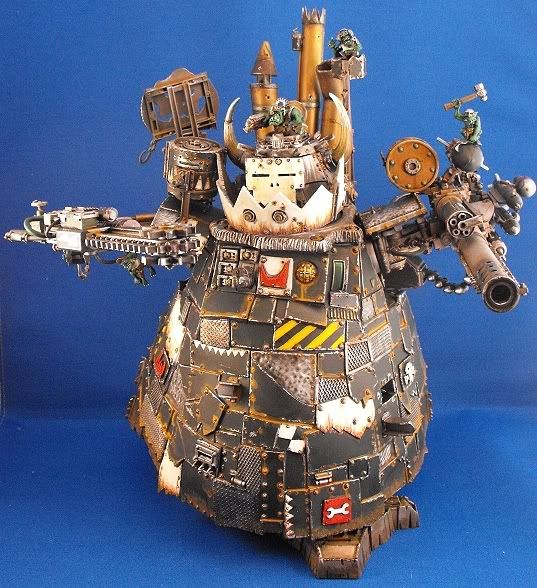
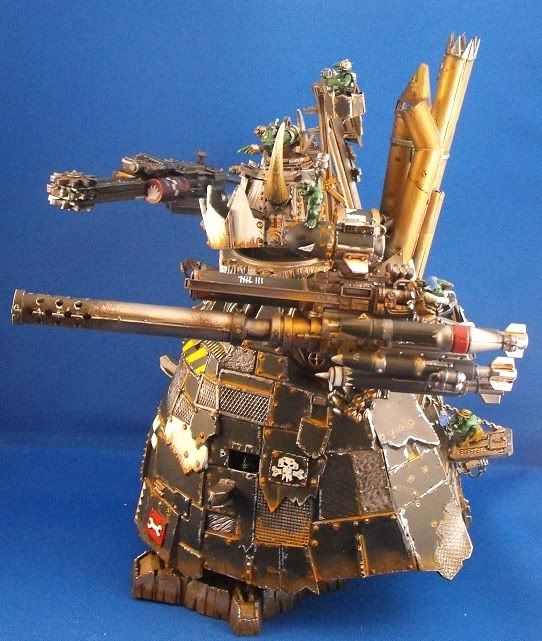
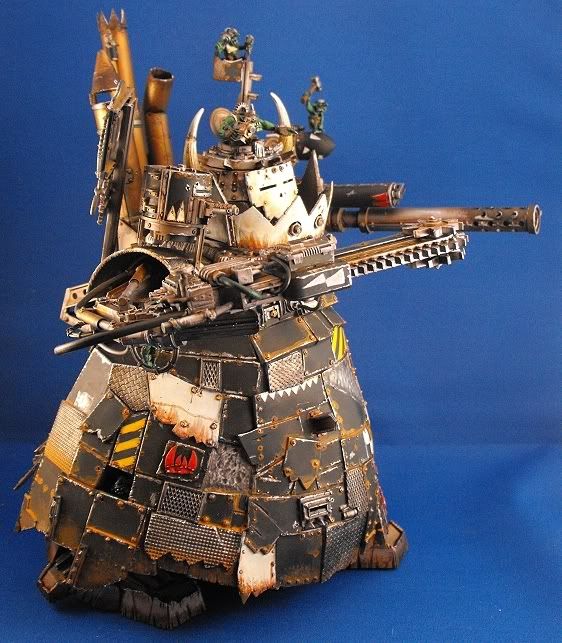
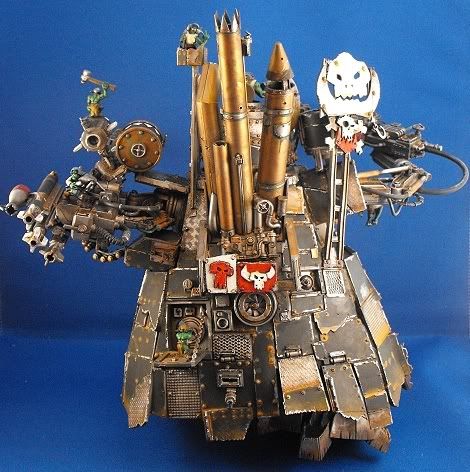
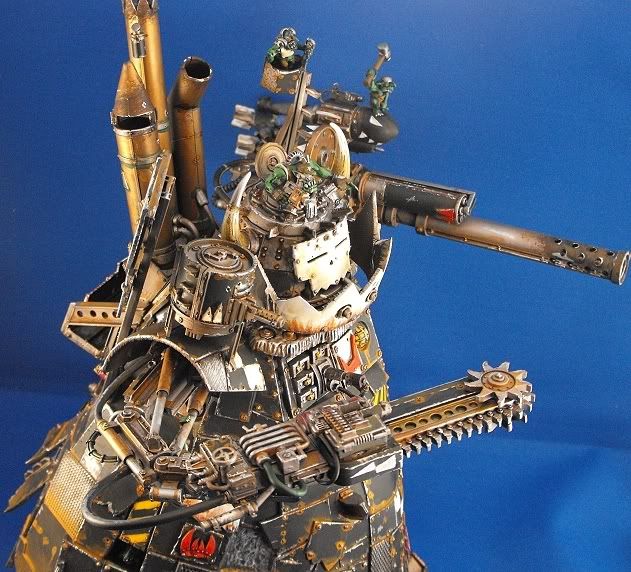
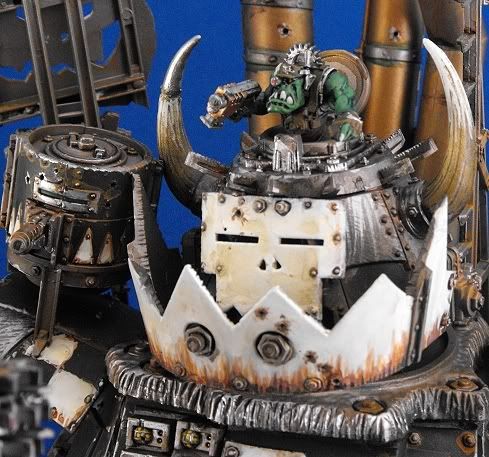
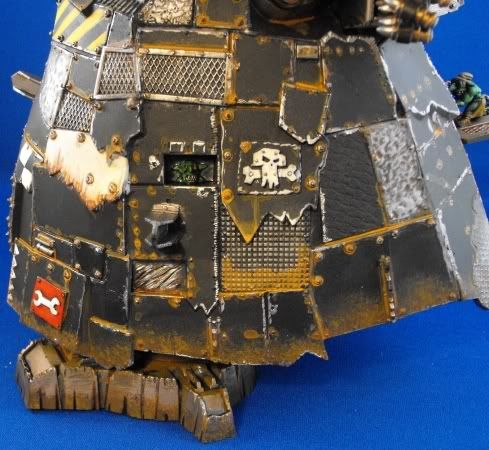
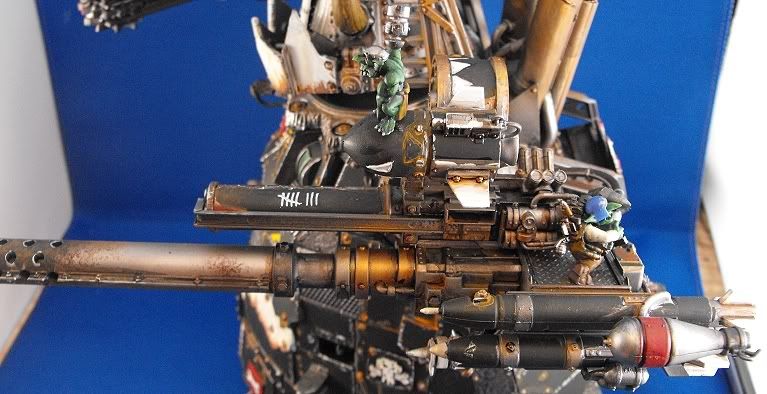
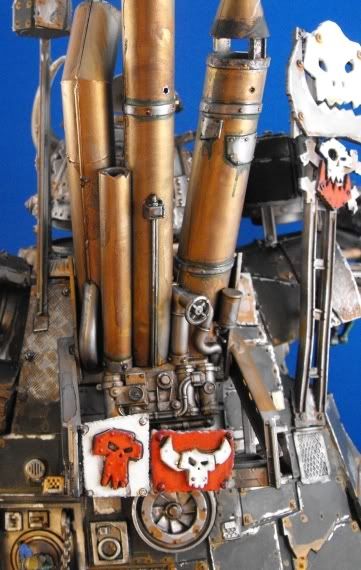
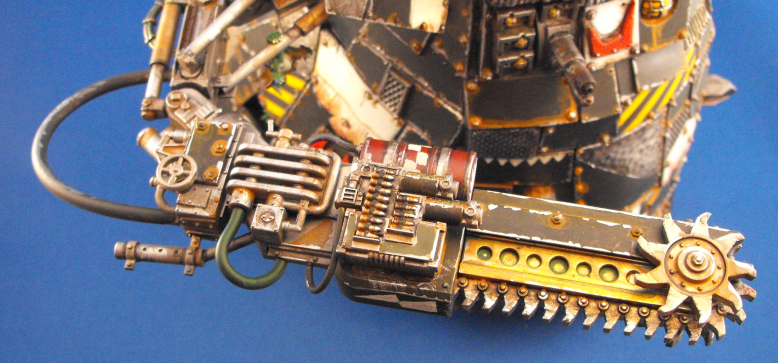
Apparently it's a super-heavy time here at the rollinwaaagh. We started off with a Stompa (which is now on it's way to a Dallas Texas GW store, say hi to it for me if you see it) and now we are on to a Stormlord. Why a storm lord... two words: FOUR DREADS. Ahhh yea. With a transport capacity of 40 & and walkers taking up 10 slots, that's four glorious dreadnoughts dumping out of this monstrosity and getting in your grill. Also, since it counts as open-topped, those dreads will be pouring out plasma death while waiting to disembark and assault. Now that is some nasty business. The stormlord is a great looking model & not to bad to paint. Scroll down to see how I did itt:


1) Base white, airbrush Kamando Kachki, & paint metal bits Boltgun Metal
2) Air brush with a light wash of Scorched Brown
At first I wasn't really pleased with the outcome, but once finished I liked it.


3) Hit all of the rivets and recesses with a wash of Chaos Black & Graveyard Earth. I'm not positive of the proportions but I included a picture of the amounts. Also, during this time I gave a wash to the metal. You can find the recipe for the wash by clicking here & scroll down to step 12. Yes, washing these rivets is going to take a while so put in that director's cut of Alien's in and get to work!


4) Use Charadon Granite to make chips in the paint. Stick to the edges or any place that might take wear.
I didn't have Charadon Granite so I used a mix of Codex Grey and Chaos Black. It is the first time I tried this technique for chipped paint and was quit pleased with the outcome.


5) Add Chain mail to highlight portions of the Charadon Granieto represent deep gouges and highlight the metal.

2009-03-30

40k Terrain - Basilica Administratum

Getting the most out of your 40k terrain kit:

Let me start by saying that after looking around the net for a while, the GW terrain kits are a deal. I recently put together the Basilica Administratum kit & think it's great. Below is the way I assembled it to get the most out of the kit. When finished, I ended up with a good sized 3 story building and 2 barricades. Here is how I did it:

1) start 
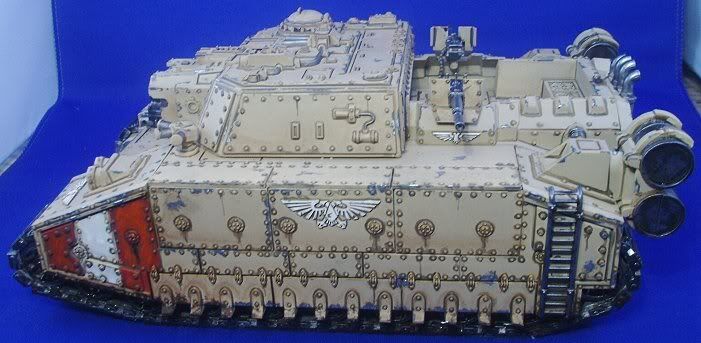
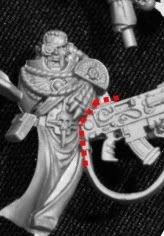
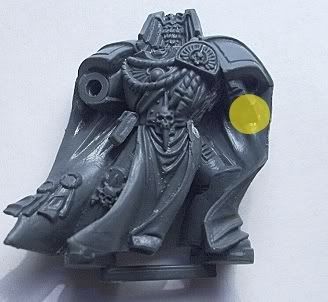
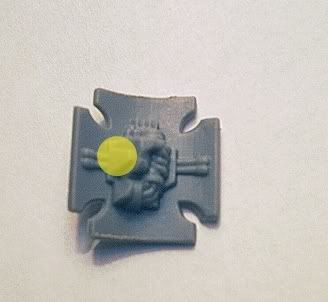
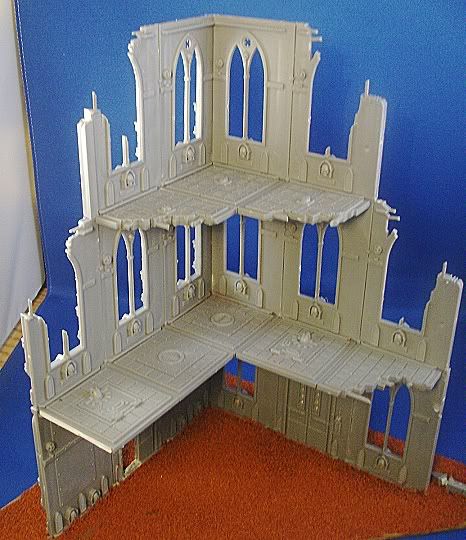
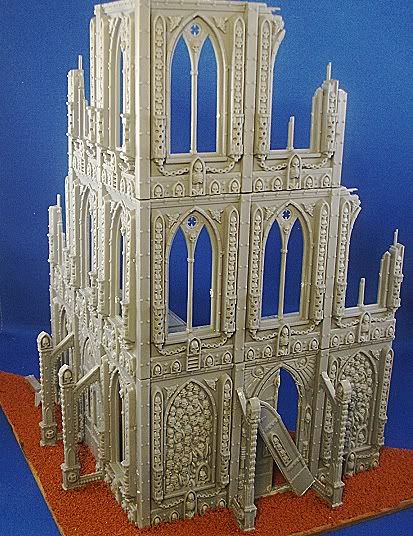
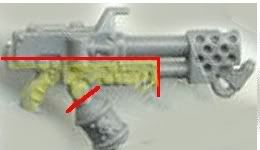
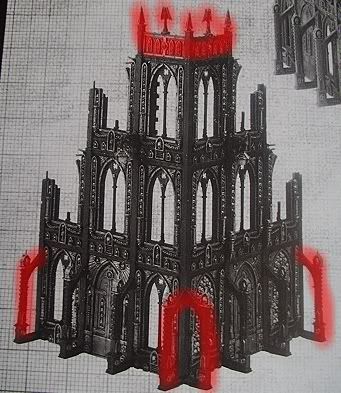
by building the pic from the directions below while leaving out the highlighted apportions.


2) With the left over parts I was able to make these barricades:

2009-03-08

WOOOOOOT! It's Stompa Time

I am excited to say that I was able to lend a had at my LGS with their new stompa. After seeing the assembled kit and drooling over it for several hours I asked them if I could offer some of my orky weathering expertise and they obliged. This is one awesome model. It is truly the quintessential ork construct. Well enough talking and on to the pics...

Click HERE for the weathering techniques used.


2009-02-22

Prepin' for a 1000 Point Tourni

Well there is a 1000 point tourni coming up next week and the Jeff's from the Rollin Waaagh have been feverishly play testing some lists. I think 1000 point tournaments are a great way for players to try out new armies and gives stores the opportunity to sell them those armies. It's a win win situation. If your local game store hasn't run one I highly encourage you to talk them into it. They really are a blast!

After being utterly crushed numerous times with my dread heavy marine list, I made a last minute change and abandoned the Emperor's finest for the Orks. Steadfast Jeff B. has the same Ork list he has been abusing me with for the past 4 weeks... jerk. Here is a look at the lists:

Jeff C's Biker Nob:
Biker Boss w/ all the fixins
Nobz x 6 w/ 2 power claws, 3 Huge choppas, Waaagh Banner, & Doc
Looted wagon the boom gun edition
Trukk Boyz x 10 with choppa, slugga, & a bosspole weilding nob
Shoota Boyz x 17 with yet another bosspole weilding nob
Battle wagon w/ big shoota for the Shoota Boyz to roll around in


Jeff B's MegaNob list
MegaArmor Boss w/ all the fixins
MegaNobz x 6
Looted wagon the boom gun edition
Trukk Boyz x 10 with choppa, slugga, big shoota & a bosspole weilding nob
Foot Sloggin Boyz x 10 with choppa, slugga, big shoota & a bosspole weilding nob
Battle wagon w/ a few big shootas for the MegaNobz
Skorcha
Killa Kans x 3 with rokkits


The Necron list that got dumped: I considered taking necron for about two rounds of their play test game. Necron are great, but they are a support oriented list. With only 1000 points to work with, the limitations are pretty severe. Needless to say, they got utterly POWNED by Jeff B's list. So, its back to the tomb ship for these guys. Maybe they will be able to function at 1000 points once there new codex comes out.

Lord with ResOrb & Veil
Destroyers x 4
Destroyers x 4
Warriors x 11
Warriors x 11

2009-02-08

Ultramarine Vindicator - PIP

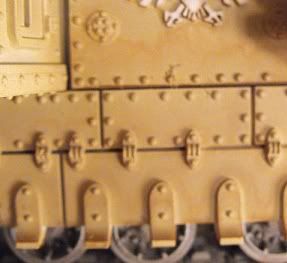
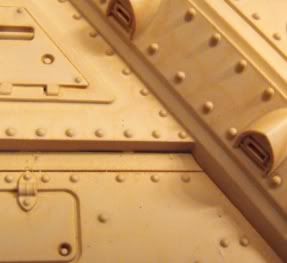
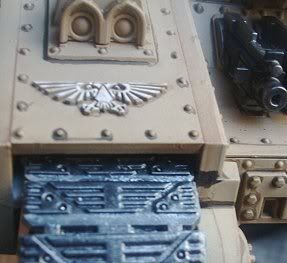
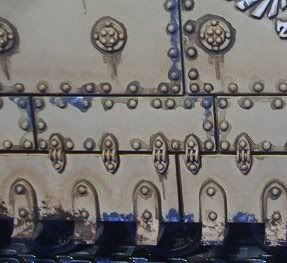
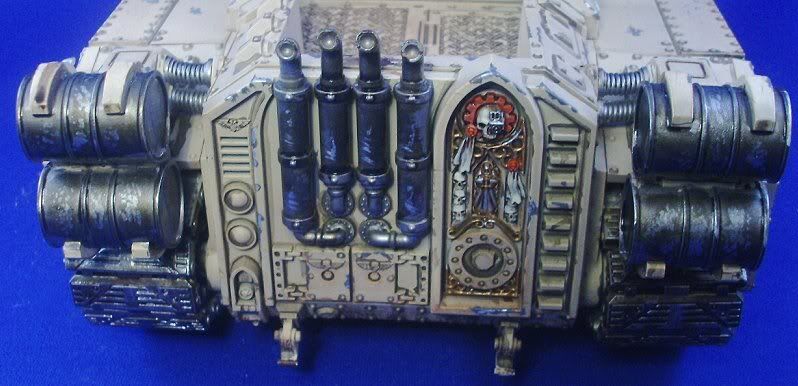
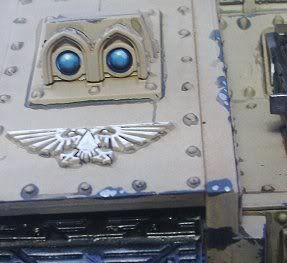
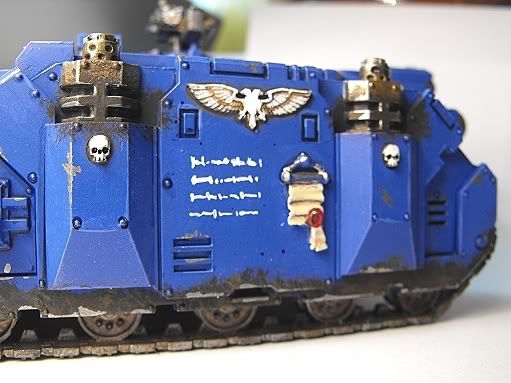
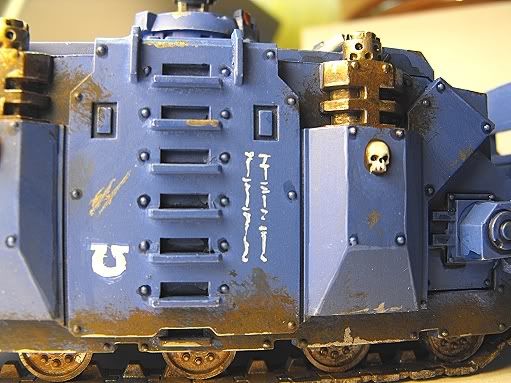
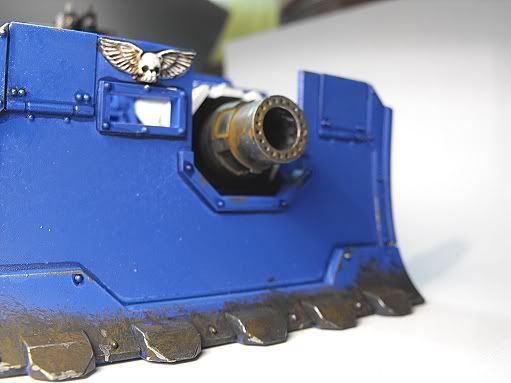
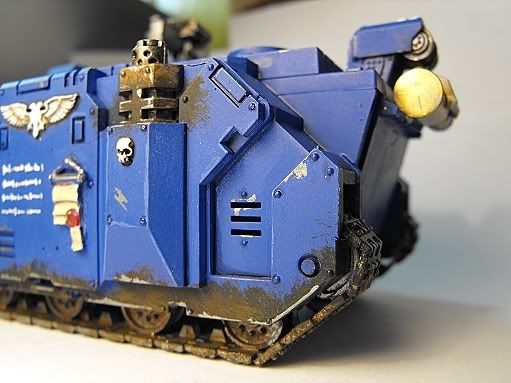
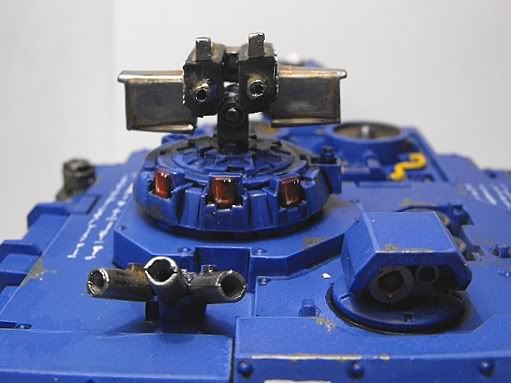
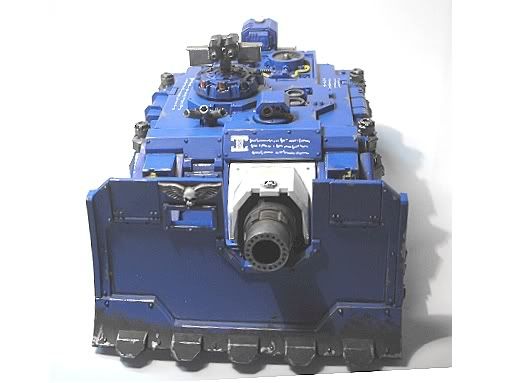
Tournament time is growing close, so that means it's time to get the mek shop crackin'. Here is a Vindicator for my Ultramarine army still in the painting process. It's definitely table top ready, but I want a lot more battle damage. I've been experimenting with really light washes, like on the white cannon mount below, and I really think it adds a lot of depth to the model. I'll be talking more about this in posts to come. So, enough talk, here are the pics:

Cheers,
Jeff C.


Here is a list of links I used for inspiration for battle damage.

Really cool muted checks:
http://www.coolminiornot.com/176663
Great severe battle damage:
http://www.coolminiornot.com/206762
http://www.coolminiornot.com/172870
Good Grime:
http://www.coolminiornot.com/212854
http://www.coolminiornot.com/99494
http://www.coolminiornot.com/122246
http://www.coolminiornot.com/169216

2009-01-26

Quick Tip #4 The Combi-Flamer

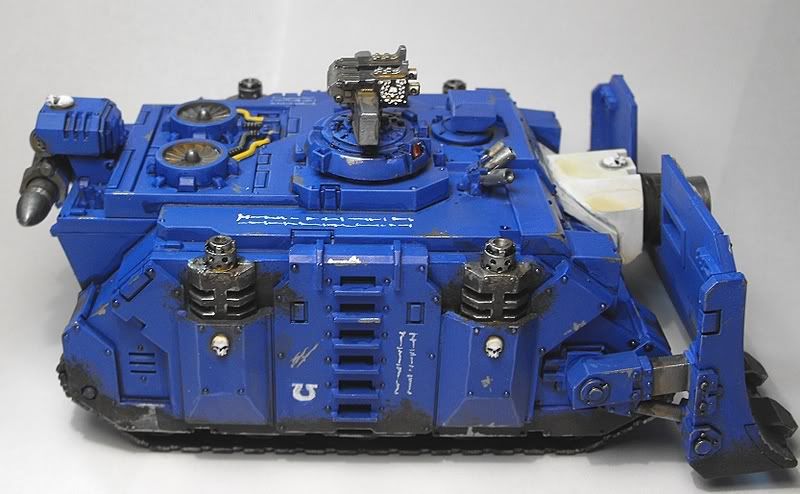
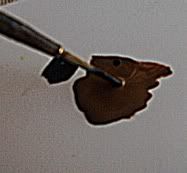
Let me start by saying that yes, these pictures stink. I blame my wife's camera, but it will do for now. Anyway, here is how I did it:


1) The Bolter: cut the bitz off the front of the bolter & scoot the gun barrel down. Discard the bitz highlighted in yellow (this includes all of the sight parts at the top). The cuts are highlighted in red.


2) The Flamer: cut off the flamer canister and save it for later. Next, follow the line made by the flamer barrels. This is where you will cut and remove the lower half.


3) Combining Them: This is easy, just glue the bottom of the flamer to the top of the bolter.
Next, file down that flamer canister so that one side is flat and glue it towards the back. In retrospect, I think I should have filed down the top of the bolter a bit to lower the profile of the gun, but overall it works.

Cheers,
Jeff C.

2009-01-23

Converting Your Black Reach SM Captian

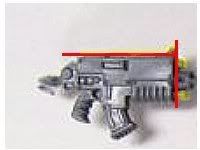
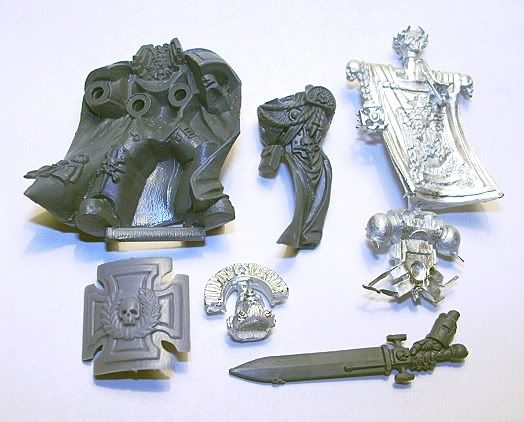
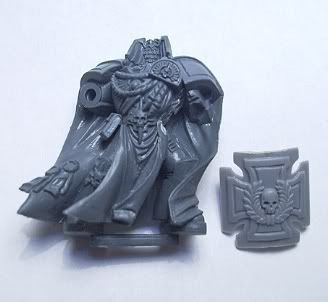
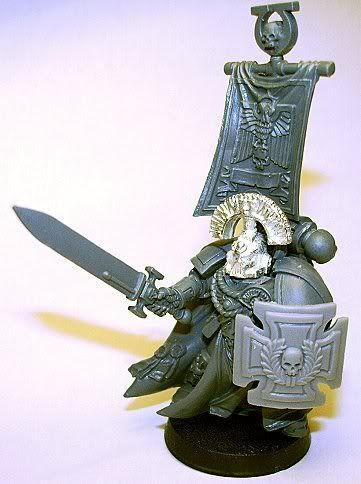
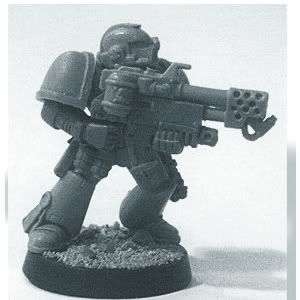
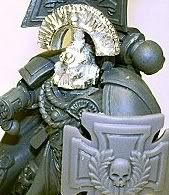
Let me start by saying that I think this is a great looking model, but I prefer my Captains to be better armed and wearing a helmet. They do after all need to set a good example for the troops. Remember that scene with Rico & the new recruits from Starship Troopers, always wear your helmet around live fire. Well enough talk, here is how to do it get your captain looking sharp with Storm Shield to boot.


Here is what you need: AOBR Captain, Storm Shield & any other fancy bitz you want to include. I used a Storm sheild from the old Terminator box set and puter bitz from the Captain Sicarius blister. In the end, I went back to the original AORB banner because the one pictured below was blowing in the opposite direction of his cloak, not good.


Step 1: Remove the bolter & off with his head. Luckily, the bolter cut doesn't have to be done particularly well because the storm sheild is going to cover up this section.


Step 2: Attach the storm shield. If your using the same type of Storm Shield that I am, the wrist will meet the cloak where you see highlighted. Add a bit of glue and it's a really easy fit.


Step 3: Glue everything else on. Huzzah! You now have a Space Marine Capetian ready to slay the enemies of the emperor, and anyone else who gets in his way...

Admin Control Panel

New Post | Settings | Change Layout | Edit HTML | Moderate Comments | Sign Out